

For hobbyists, engineers, and machinists alike, the heart of any CNC machine is its controller. While the mechanical frame provides the structure, the controller provides the intelligence. Building a DIY CNC controller from scratch is not only a cost-effective way to power your machine, but it also gives you an intimate understanding of how your system operates, making future maintenance and upgrades significantly easier.
In this comprehensive guide, we will walk you through the entire process: selecting the right components, understanding wiring schematics, managing power distribution, and configuring the software. Whether you are retrofitting an old mill or building a router from the ground up, this guide is your blueprint for motion control success.
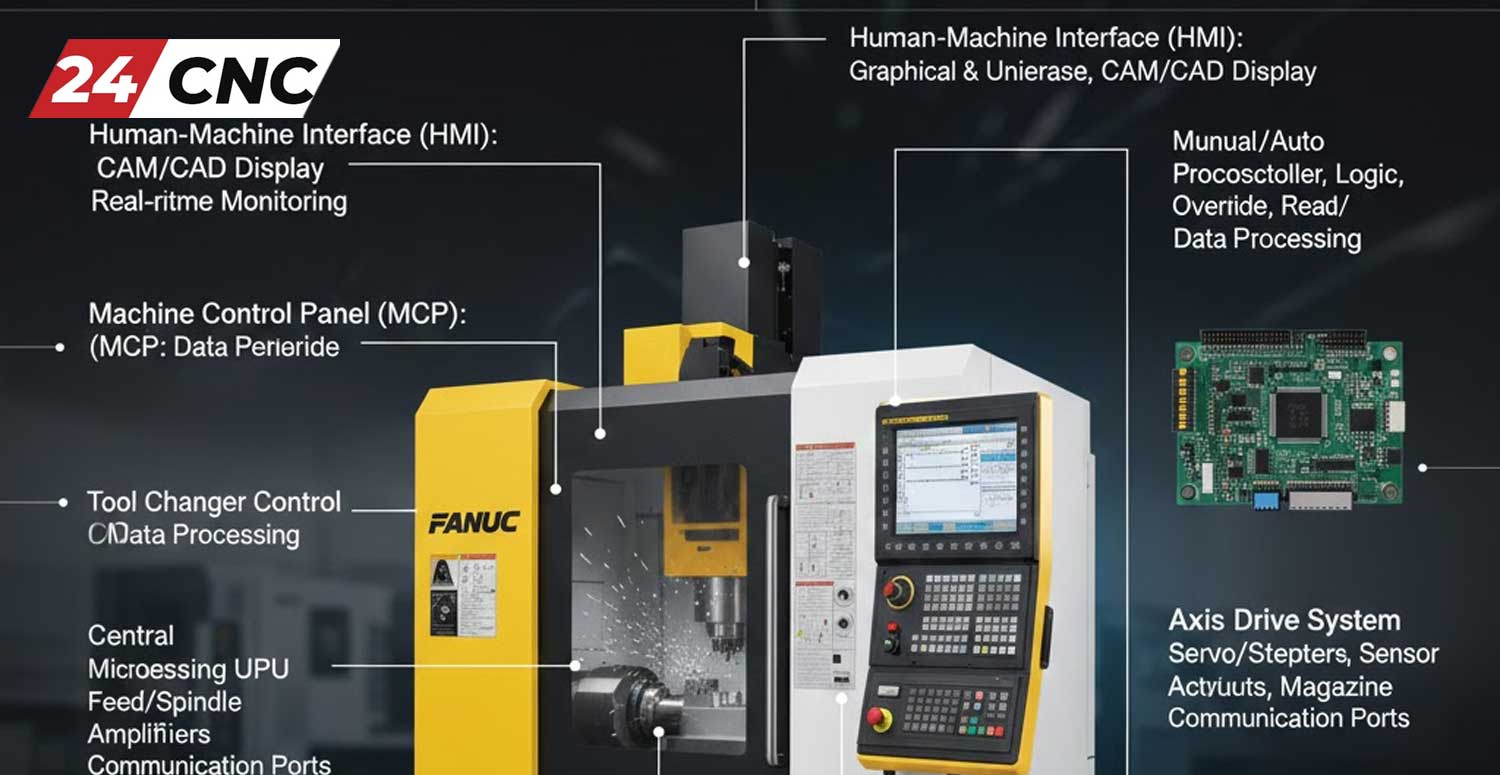
1. The Anatomy of a CNC Controller
Before heating up the soldering iron, it is crucial to understand what actually goes inside the control box. A robust controller is a symphony of electronic components working in unison. At its core, the system translates digital G-code instructions from your computer into physical electrical pulses that move motors.
The primary subsystems you will need to assemble include:
- The Brain (Interface Board/Motion Controller): Interprets signals from the PC.
- The Muscle (Motor Drivers): Amplifies low-voltage signals to drive stepper or servo motors.
- The Heart (Power Supply Unit): Provides the necessary DC voltage to the drivers and boards.
- The Nervous System (Wiring & Connectors): Transmits signals and power safely.
2. Selecting the Critical Hardware
The quality of your build depends entirely on the components you choose. Let’s break down the essential parts list.
The Motion Controller / Breakout Board
This is the bridge between your computer and the machine. For DIY builds, you generally have three routes:
- Arduino/Microcontroller based (GRBL): Excellent for simple 3-axis routers and laser cutters.
- Parallel Port Breakout Boards (Mach3/LinuxCNC): The classic choice for retrofits, though requiring a PC with a parallel port or a smooth stepper adapter.
- Dedicated All-in-One Controllers: Industrial-grade options like dedicated control systems offer higher reliability but at a higher cost.
Stepper Motor Drivers
Your microcontroller cannot drive motors directly. You need drivers. Common DIY choices include the TB6600 (entry-level) or the DM542/DM556 (digital, quieter, and smoother). If you are aiming for high precision, consider closed-loop stepper drivers or even servo motors for position feedback and error correction.
Power Supply Unit (PSU)
Selecting the right power supply is critical. You need to match the voltage to your stepper drivers’ capabilities (usually 24V, 36V, or 48V). A higher voltage generally allows for higher motor speeds. Ensure your PSU has enough amperage to cover all motors running simultaneously plus a 20% safety margin.
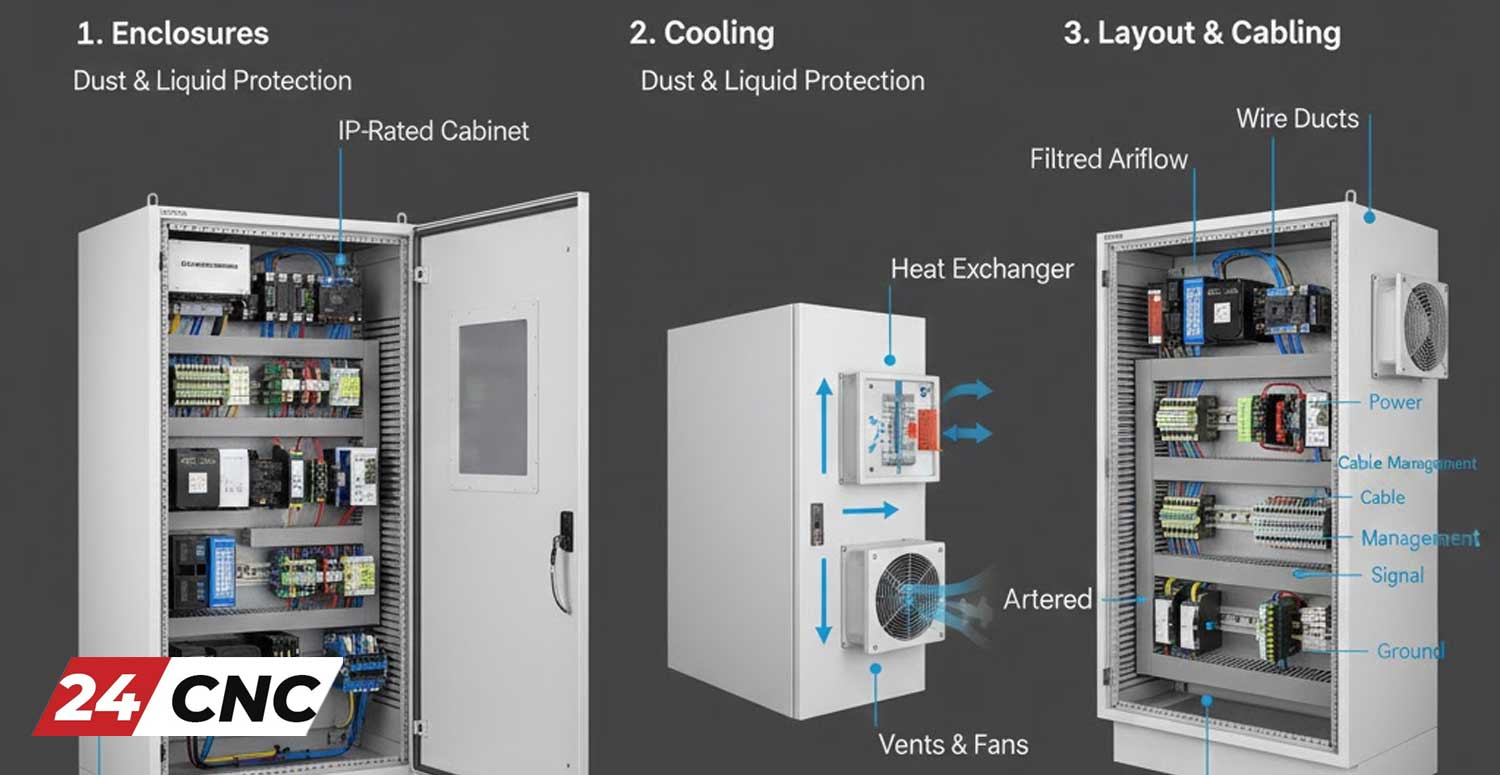
3. Enclosures, Cooling, and Layout
A pile of wires on a workbench is a hazard. You need a proper enclosure. When laying out your components inside a metal cabinet (which helps with EMI shielding), consider the heat.
Stepper drivers and power supplies generate significant heat. You must incorporate active cooling. Installing high-quality cooling fans is mandatory to prevent thermal shutdown during long machining jobs. Plan your airflow so that cool air is pulled in from the bottom and hot air is exhausted out the top.
4. The Art of Wiring: Connectivity and Safety
Wiring is where most DIY builds succeed or fail. “Noise” or Electromagnetic Interference (EMI) can cause your machine to behave unpredictably—stopping mid-job or missing steps.
Shielding and Grounding
Always use shielded cables for your stepper motors and limit switches. The shield (the metal mesh inside the cable) acts as a cage, trapping interference. Crucial tip: Only ground the shield at the controller end (star ground), never at the motor end, to prevent ground loops.
Connectors and Sockets
Do not just twist wires together. Use proper sockets and connectors. Aviation plugs (GX16) are a standard in the DIY CNC community because they screw lock, ensuring vibrations don’t shake a connection loose.
Fuses and E-Stops
Safety is not optional. Your mains power input should be fused. Additionally, individual fuses for your drivers can save expensive components if a motor shorts out. Check out various fuse series to find the right amperage for your setup. Finally, install a physical Emergency Stop (E-Stop) button that cuts power to the drives immediately.
5. Adding Advanced Peripherals
Once the axes are moving, you can upgrade your controller’s functionality.
Limit and Homing Switches
These sensors tell the controller where the physical limits of the machine are. Inductive proximity sensors are often preferred over mechanical switches because they don’t wear out and are less susceptible to dust.
MPG Handwheels
Trying to position a CNC machine by tapping keyboard keys is frustrating. Integrating an MPG Handwheel allows you to manually jog the machine with professional precision, making setting up work zeros significantly faster.
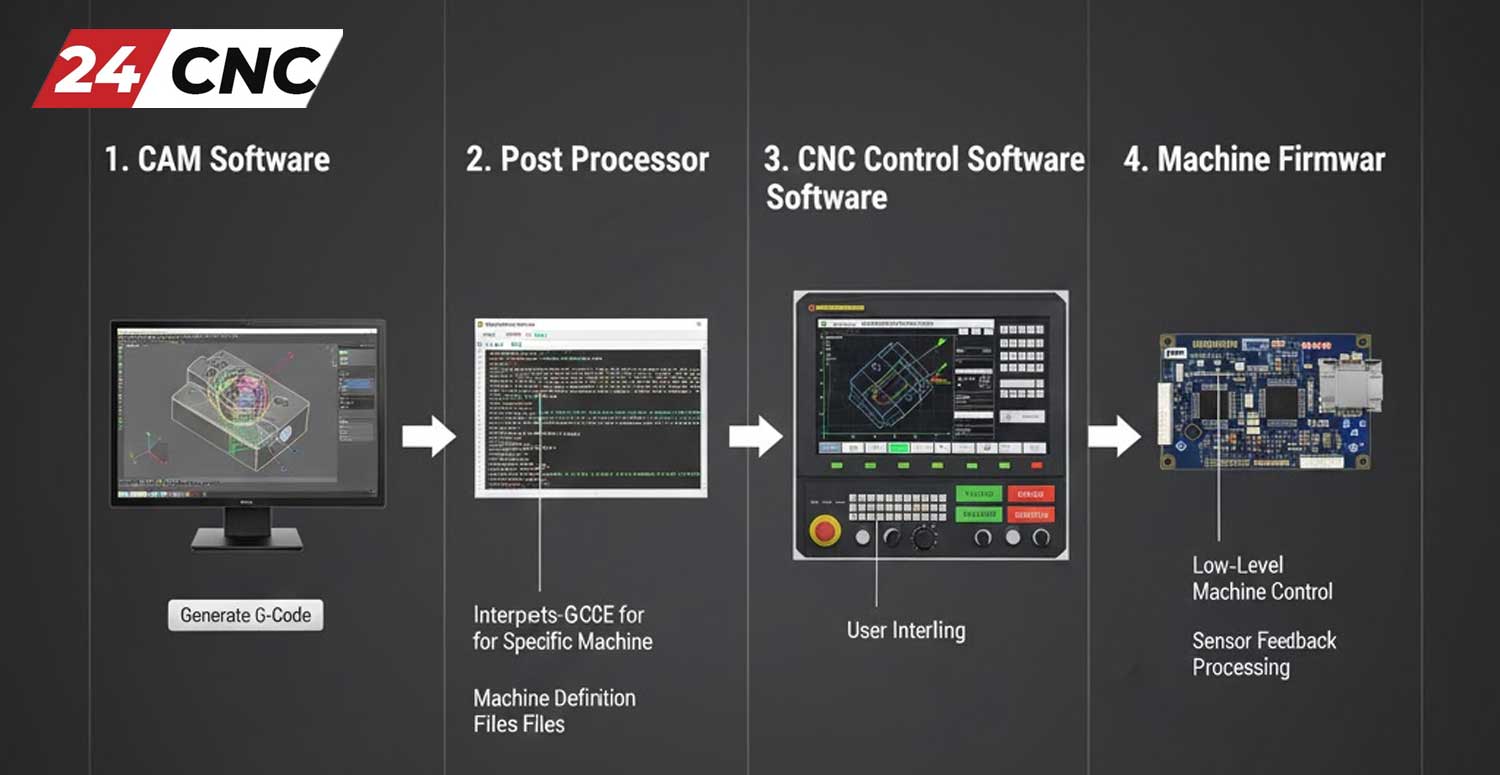
6. Software Configuration
With hardware assembled, you must configure your software (Mach3, Mach4, UCCNC, or GRBL). You will need to calculate your “Steps Per Unit.” This formula depends on your motor step angle (usually 1.8 degrees), your driver micro-stepping setting, and the pitch of your leadscrew or ball screw.
Formula: (Steps per Revolution x Microsteps) / Pitch of Screw = Steps Per Unit.
7. Troubleshooting Common DIY Controller Issues
Ghosting/Random Movements: usually caused by EMI. Check your grounding and ensure high-voltage cables (spindle power) are not running parallel to low-voltage signal cables.
Overheating Drivers: Check your current (amperage) dip switch settings on the driver. If they are set too high for the motor, the motor will overheat. If the driver overheats, check your drive cooling fans.
Comparison: Control Ecosystems
| Feature | Arduino (GRBL) | Mach3/Mach4 (PC Based) | Industrial (Fanuc™/Siemens) |
|---|---|---|---|
| Cost | Very Low | Moderate | High |
| Complexity | Beginner Friendly | Intermediate | Professional |
| Real-time Performance | Limited (8-bit) | Good (Depends on PC) | Excellent (Dedicated Hardware) |
| Best Application | 3D Printers, Lasers, Small Routers | Retrofits, DIY Mills | Production Machines |
| Peripherals | Limited | Extensive (MPG, Probes) | Fully Integrated |
8. Conclusion
Building a DIY CNC controller is a rewarding project that bridges the gap between electronics and mechanics. By carefully selecting your power supply, drivers, and implementing proper wiring hygiene with shielded cables and quality connectors, you can build a system that rivals commercial units.
Remember, a CNC machine is only as reliable as its weakest link. Don’t skimp on the essentials like cooling, grounding, and power protection. Take your time, double-check your schematics, and enjoy the precision that comes from a machine you built with your own hands.
Frequently Asked Questions
Q: Can I use a computer power supply (ATX) for my CNC?
A: While possible for very small Arduino setups, it is not recommended for larger machines. ATX supplies often lack the voltage (usually only 12V) required for high-speed stepper motor operation. Dedicated CNC power supplies (24V, 36V, 48V) are far superior for torque and speed.
Q: Why do my motors lose steps?
A: Lost steps are usually caused by mechanical binding, aggressive acceleration settings in software, or electromagnetic interference (EMI). Ensure you are using shielded cables properly grounded to the controller side.
Q: What is the difference between a breakout board and a motion controller?
A: A breakout board simply gives you screw terminals to access the pins of a PC’s port (like Parallel). A motion controller (like a USB or Ethernet board) has its own processor to generate the pulses, taking the load off the computer and providing smoother motion.
Q: Do I need a specific fan for the controller box?
A: Yes. Stepper drivers generate heat. If they get too hot, they will cut out to protect themselves. Always install fans to ensure positive airflow through the enclosure.
Ready to Build Your Dream Machine?
Whether you are looking for specific capacitors, industrial-grade Fanuc controllers, or high-quality cables to finish your DIY build, 24CNC has the parts you need.
Leave a comment
Your email address will not be published. Required fields are marked *